17 August 2009


Now, what could I be doing? And what would it have to do with this?
Hmmm . . . stayed tuned to find out!

7 August 2009

Momma, Sarah Mae, Myself, & Breezy (Photo by Jesse)
Last weekend we had Sarah Mae (from Like a Warm Cup of Coffee) and her family over from Wednesday through Sunday morning. It was a wonderful weekend of rich fellowship and getting to know one another in person. We originally met Sarah online through our blogs over a year ago, and we were blessed to actually meet her in person – and get to spend a whole weekend with her family!

Ella holding Daddy’s hand . . . how sweet! (Photo by Breezy)
After they arrived Wednesday evening, we talked and got to know each other a little better. It is interesting how strange it is to finally see someone “move” who one has only seen in pictures. It was also a relief (not that we had any doubts) to find that we all got along splendidly! What kindred spirits they are!

Journeying through the Creation Museum.
Thursday we ate, talked, watched Return of the Daughters►, ate, and talked the rest of the day away. On Friday we all drove down to the Creation Museum► and spent the day there. It is always so good to go through there (no matter how many times!), and we were able to help watch over the children so that Jesse and Sarah Mae could soak it all in.

Sweet little Caroline in Maggie‘s arms. (Photo by Breezy)
One of the special parts about their visit was having children in the house – it was wonderful to get to practice our “mothering skills”! Children are such precious blessings from the Lord, and it is amazing to see them grow and learn – just like we do in our daily walks with God!

Sarah Mae and Myself (Photo by Momma)
We spent Saturday much like Thursday, but in addition to that we worked on Sarah’s new blog design ►. Sunday morning was their departure time. It was sad to see them go, but if they did not go we would not be able to visit them, nor could they visit us again.
We loved listening to and learning from Sarah Mae, in her gracious and joyful manner! What a blessing this dear family has been to ours! They are forever friends . . . always there, always in our hearts.
To read more about our visit, you can read Sarah’s Post ►,
Momma’s Post ►, and Breezy’s Post (coming soon).
27 July 2009
In her book, Hidden Art►, Edith Schaeffer explains:
“All art involves conscious discipline. If one is going to paint, do sculpture, design a building or write a book, it will involve discipline in time and energy — or there would never be any produce at all to be seen, felt or enjoyed by ourselves or others.“
How true this statement is! Without perseverance, and a great deal of discipline, art cannot be produced to its greatest potential! If we rattle-tattle around and do not diligently strive to make progress, how will our talents ever develop?
Art can be beautiful. Art can be ugly. What are we striving for in our art? What are we spending our time creating? Are we producing work that honors our Creator (who created beauty), or work that dishonors our Creator? What is the motive of our art?
We must create art that glorifies God. Our motive should not be selfish gain, money, praise, or anything other than to point to our Lord. It is He that created us, and why would we wish to do anything that would displease Him and bring shame to is His Name?
Just as art requires “conscious discipline”, so does our motives. It is only by God’s grace that we breathe, that we see, that we hear, that we feel, . . . and that we create. It is He that gives us those talents, and the patience to cultivate and grow them. No matter how “good” our art becomes, may we never refrain from giving God all the praise.
As we create art around us (and as we do everything), let us forever keep at the forefront of our minds that our motives (in everything) should always be to glorify God!
16 July 2009

In 1982, soon after my parents met.
“I’m not planning on getting married,” to which my mother replied, “I’m moving to Chicago next month for college.”
This was one of their first conversations, but it was not their last. My parents “fell” in love. My mother did go to college, but returned home after staying only four months because she missed my father (I don’t think it was because she missed her job a McDonald’s).
My parents were married about a year later. I am so very thankful for God’s grace in their lives, and the miracle He performed. They were not Christians, but later in life He saved them, calling them into His service.
Breezy and I have been blessed to be raised in a Christian home, where we have grown closer as a family as we have grown closer to our Lord and Savior. I praise God for my parents and how He has used them to teach and train us — all in the fear of Him.
I am inspired by my parents. I am inspired by the way my parents serve, the way they study God’s Word (and share with us), and the way that they fear the Lord and not man. I will be forever grateful for my faithful parents!
“In the fear of the Lord there is strong confidence,
And his children will have refuge.” – Proverbs 14:27

In 2009, now married for 26 years. (Photo by Breezy)
I love you Daddy and Momma!
6 July 2009
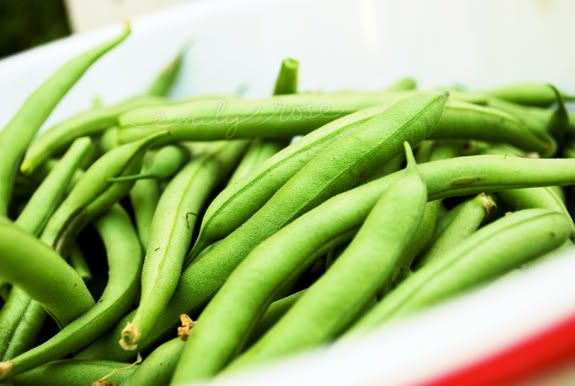
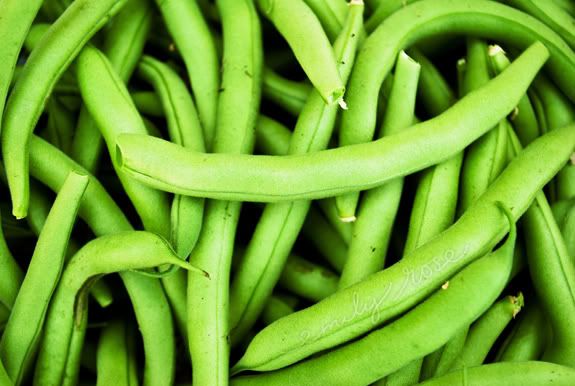
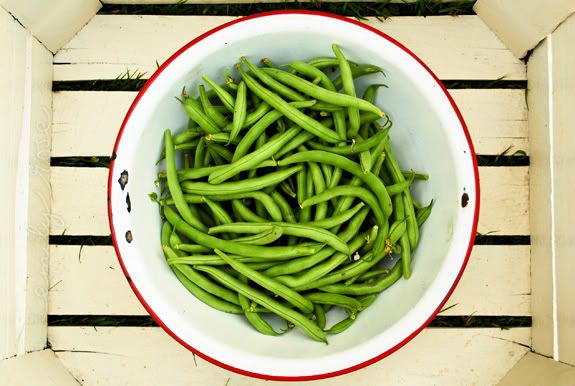
This morning, Momma picked our first harvest of green beans from our boxes. The plants are happy and healthy (though a bit short), and are producing delicious-looking beans. And that color of green is downright charming!

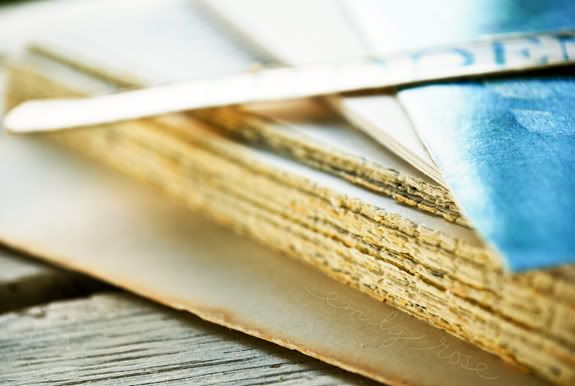
Yesterday, I rebound (using the Zutter binder) an older copy of Hidden Art by Mrs. Edith Schaeffer. I wanted it in notebook form so that it would be quick to flip through and I could easily take notes. I did do something silly with the binding (as in punching the holes on the wrong side of the book), but it just reminds me that I’m not perfect and how much I need my Savior — even in the little things!
As to my recovery, I am doing very well indeed! Friday was the first day that I was able to bearably go without pain medicine, and I have been feeling progressively better each day. Now, I am nearly back to normal (minus four wisdom teeth). Thank you all for your prayers!
6 May 2009
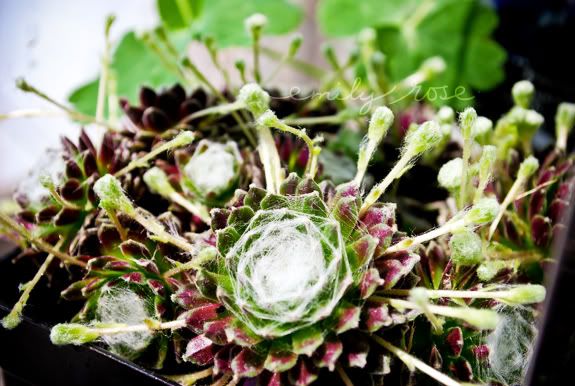
When I picked them up at the green house they did not look quite like this, as those “charming” legs had not protruded from between their petals yet. These comical little plants are a variation of the sweet hen and chicks.

Their centers are filled with natural white threadlike substance which has the appearance of cobwebs. That is why this variation of the hens and chicks is called, “Cobweb”.

I call them “my spider monkeys” because they are a bit silly and make me think of spiders when all the chicks are sticking out the sides.
Have you planted any new plants? I would enjoy hearing about them!
27 April 2009
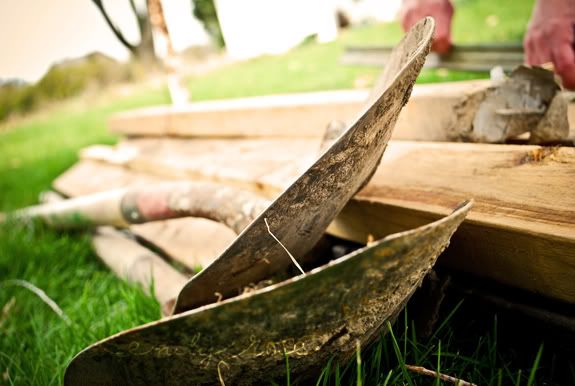
We have been quite busy working on our little homestead together as a family. Projects that include the whole family are such a joy! It is such a blessing to get to work alongside my wonderful father, mother, and sister.
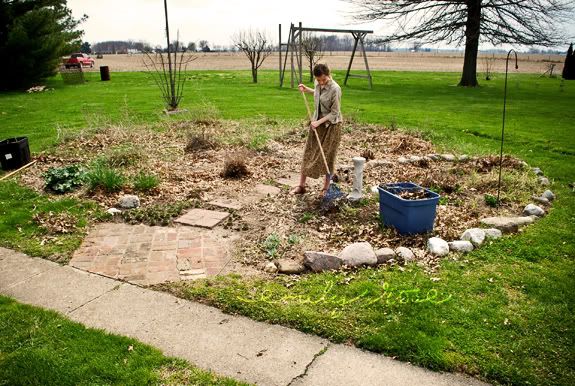
We worked in our herb garden, raking the leaves left from last autumn.
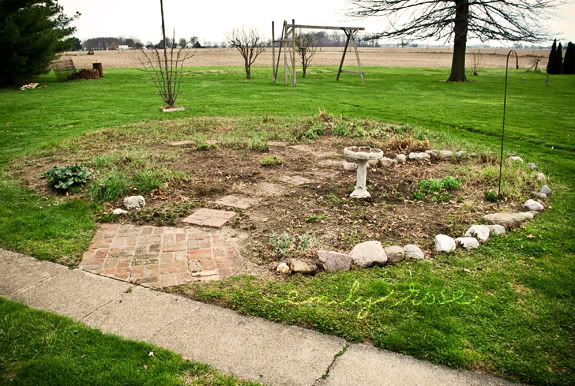
Instead of such a large circle, we are only keeping half of it and will fill the rest with our soon to be Square-Foot-Garden. The wind has been very strong as of late, so that has put off our soil mixing for now, but we are looking forward to putting it all together!
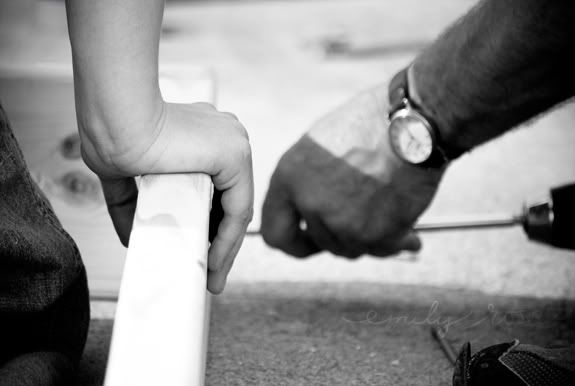
Breezy and I built boxes with Daddy for the raised garden bed. I just love working along side my daddy, he is such a wonderful, godly leader!
We moved the shed by rolling (screechy rolling) it on pipes which were in between boards and the bottom of the shed. Every couple feet they had to be moved, but it went more smoothly with us all helping than we thought it would.
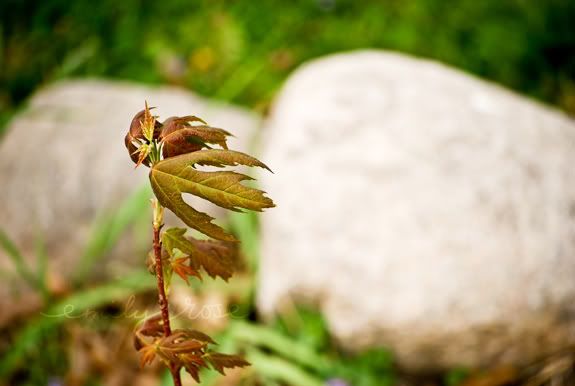
There are several healthy Maple saplings throughout the garden. We plan to replant them as well as our little Pin Oak saplings.
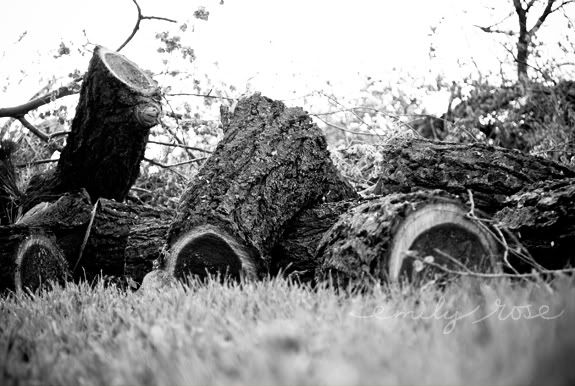
We moved logs from one corner of our property (where a tree had just been cut down) to our wood pile at the other corner.
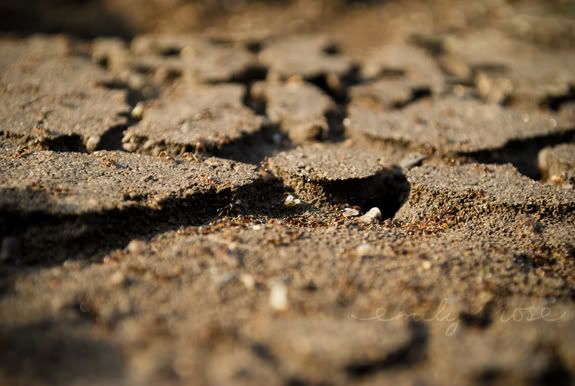
Under a step that I was moving, I found a nice size ant home. Their tunnels were amazing to look at and it was neat to see what God-given craftsmanship such little bugs have! We decided to give them some time to relocate, as they were panicking over what to do with all their little ones.
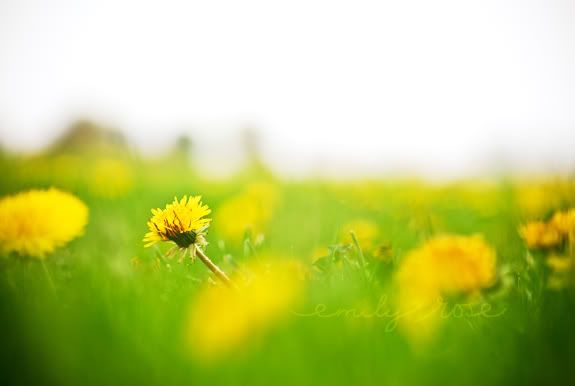
All throughout the yard are cheery little dandelions, just waiting to be picked.
“He will bless those who fear the Lord.
The small together with the great.
May the Lord give you increase,
You and your children.
May you be blessed of the Lord,
Maker of heaven and earth.”
– Psalm 115:13-15 –
19 December 2008

This little pouch I created is simple to make and easy to fill. It is the perfect size to hold little treasures found on adventures, such as pebbles, fossils, pine cones, berries, leaves, buried treasure, or any other little thing found while exploring. It is also the perfect place to store goodies (candies, cars, doll clothes, ribbons, toys, sewing supplies, etc.).
Supplies:
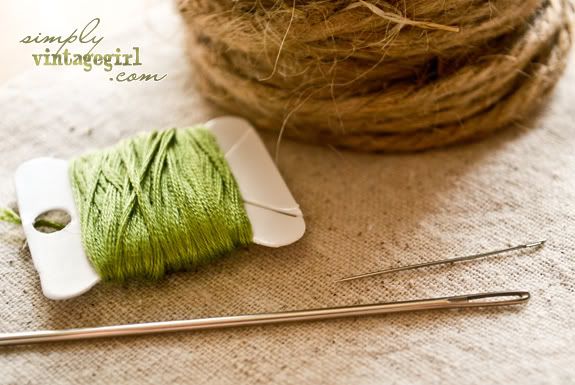
• Burlap or Course Muslin – material for pouch (I cut a folded piece of muslin, with the cut dimensions 6.5 inches wide, and 7.5 inches tall)
• Needles – small for sewing, large (very large) for pulling twine through material
• Twine – for draw-string (I used two that where each about 20 inches long)
• Thread – embroidery floss will work well (I used 3-ply)
Directions:

1. Fold about an inch of the top edge inward. Knot and sew (with the straight stitch) across, making a nice hem. This will be seen from the outside when the pouch is finished, so make the stitches the way you would like them to look.
2. Sew the straight stitch about a quarter of an inch from the raw edge. Knot and and cut thread.
3. Hem both ends in this way, making sure to fold them down on the same side of the material – what will be the inside of the pouch.
4. Fold them together, front pieces facing together. Sew about 3/8-inch from the edge all the way down to the bottom.
5. When you come to the bottom where the material is folded, knot securely.
6. This type of finish will make the bottom corners of bag to appear like this when folded right-side-out.
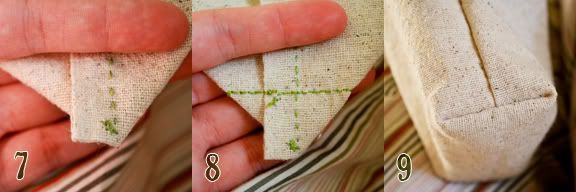
7. For different corners that give more room at the bottom of the pouch, here is a variation. Sew just like before, but add another step. Flatten the inside corner of the pouch to make a triangle, and fold the seam to one side.
8. Sew straight across triangle about 3/4-inch from the tip.
9. When turned right-side-out, the corner should look something like this.
10. The inside of the pouch should look like this.
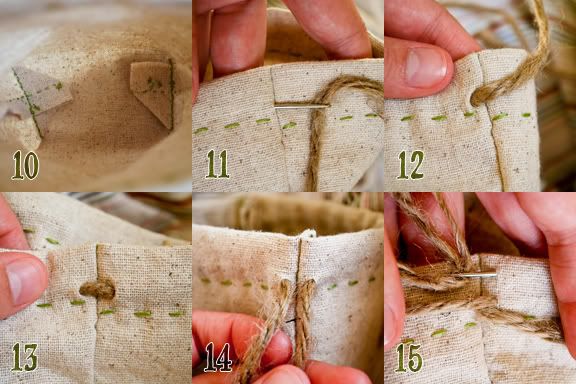
11. Turn pouch right-side-out. For the draw-string, take a very large needle and thread the twine through it. Poke needle through the first layer of the material at the top of pouch, but not through the second piece. Poke the needle back out through the other side at the edge. Now, this is a little stressful, but if you have strong material it should be alright. Pull the needle through the first hole that was made, dragging the twine through the hole with it. Pull the needle through the second hole on the other side as well.
12. It should look something like this.
13. Do the same on the other side of the hem to where you have something that looks like this on one side,
14. and two pieces of twine on the other.
15. Do this again, just on the other side. When you are finished, each side should have a small line, and a set of twine ends.
16. To keep the twine in good condition and from sliding through the casing, tie knots in the ends of both sets.
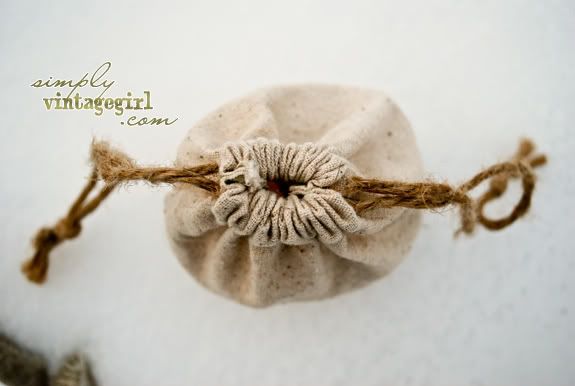
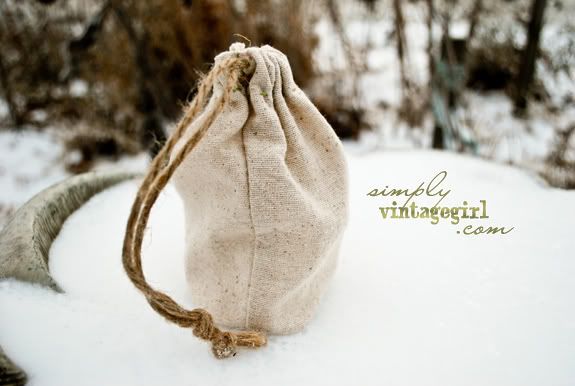
If this pouch is for a little lady, you can embroider any type of decoration you would like (e.g. flowers, verses, etc.) for extra beauty.
I keep my sewing supplies – needles, thread, etc – inside of my pouch, and have found it quite handy. I hope you enjoy yours!
11 December 2008

Welcome to the eighth A Homemade Christmas! This is week Eight of Ten (you don’t have to enter in each one). I hope you’ll join us in sharing about homemade gifts that you have received or made — past, present, and future!
You can click here for the Introductory post.
Pincushions are practical and the perfect place to store any stray pins.
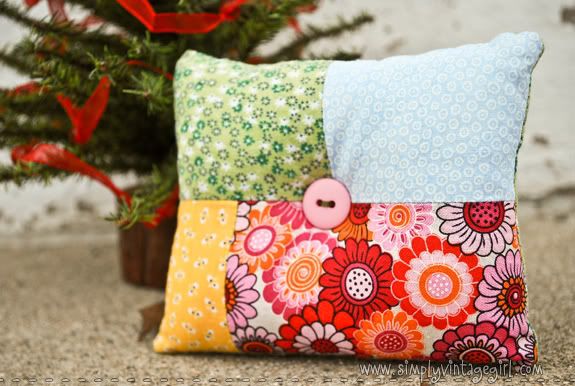
This pillow pincushion is simple, yet quite lighthearted and cheery. This is the front, with a patchwork of four colorful fabrics.
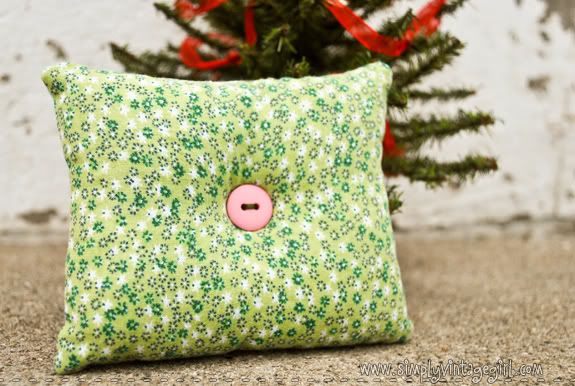
The back of the cushion with a pink button for extra beauty.

The finished size of the cushion is 4.25″ x 3.75″. A pretty pincushion would be such a nice treat for anyone!
Have you made or received any homemade gifts? If you’d like to make a post about your homemade gifts, you can sign Mr. Linky below. You can add one of my Homemade Christmas icons to your blog by clicking here. Each Thursday (until the end of December) there will be A Homemade Christmas post! Hope you’ll join in the fun as we learn, inspire, and encourage one another!