2 December 2008

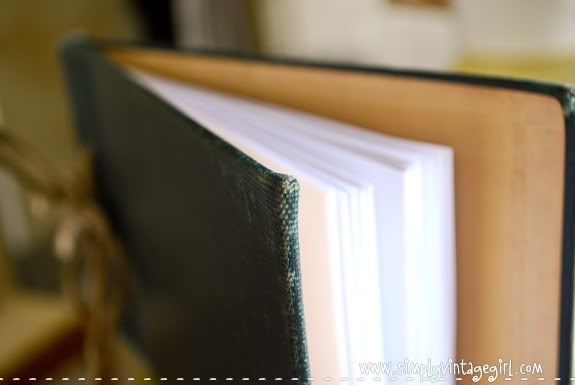
An autograph book is a sweet place to store and collect autographs. From family to friends, and even the famous. You can use it as a guest book for the visitors in your home, at graduation parties, etc. It is nice to go back and read through it to see what notes others left. What a great way to remember the special events in your life!
Supplies:
• Cover of an Old Book, preferably blank
• Razor Blade
• Boning Tool
• Eyelet Punch
• Hammer
• Paper Cutter or Scissors
• Hole Punch
• Twine
Directions:
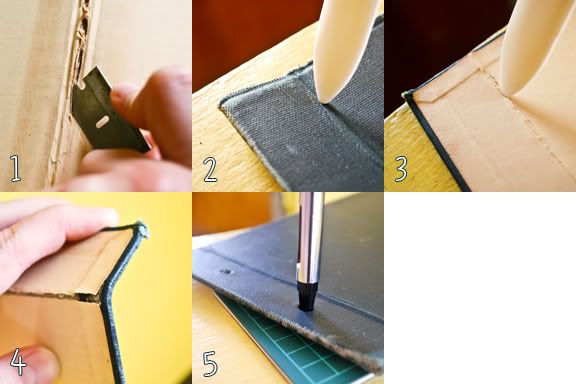
1. Cut the cover of the old book from the binding. I found that a razor blade works best, but please take all caution when using one.
2. Use boning tool to put crease in book cover. Mine is about 1.25″ from the edge.
3. Repeat step 2 on other side.
4. Bend the cover backwards where the creases were made.
5. To punch holes in cover, use an eyelet punch and hammer to go all the way through. Make sure to have a protected surface underneath (I used a self-healing mat).
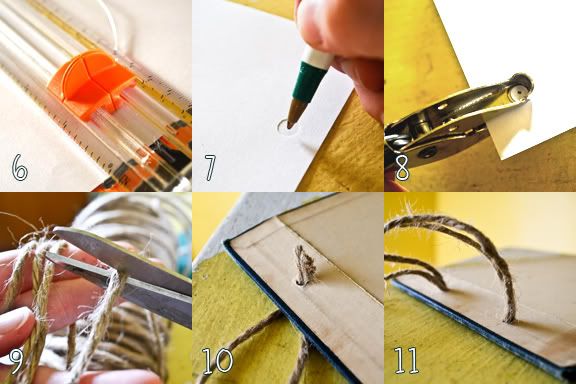
6. Cut paper to the desired size that will fit inside book cover. I cut 8.5″x11″ sheets in half, making 5.5″x8.5″ sheets.
7. You can make a template out of paper by punching holes in the correct place, then align the template on top of the cut-out paper, and make a mark in the center.
8. Punch a hole with the dot in the center. In this way each page should line up just right.
9. Cut a piece of twine that will be long enough to go around both holes, with extra length to tie a bow. I doubled my twine because with only one it was too loose and the holes were too large.
10. Poke the twine through the hole from the outside on the back cover. Pull about half the length through.
11. Take the other end and poke through the other hole, and pull the rest of the way through until each side is about the same length.
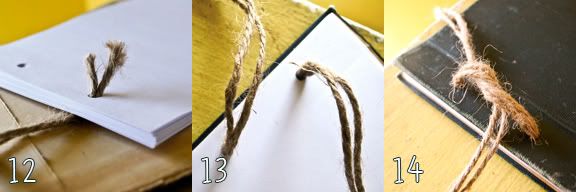
12. Poke each side through the stack of cut and punched paper.
13. Pull through until each side is even. Add front cover and pull through.
14. Knot securely and add a bow for prettiness.
A few ideas for extra beauty: Old photos, lace, ribbon, buttons, etc. I have not added any decoration to mine yet, though I do plan on doing so.
I now wish I had made one long ago because I have acquired several autographs, but they are all in different places. I hope you enjoy making your own autograph book!

30 October 2008

Welcome to the second A Homemade Christmas! This is week Two of Ten (you don’t have to enter in each one). I hope you’ll join us in sharing about homemade gifts that you have received or made — past, present, and future!
You can click here for the Introductory post.

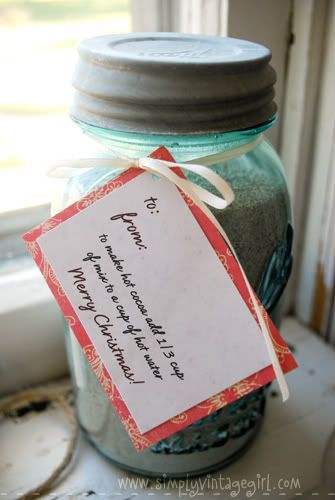
Who could resist a nice warm mug of Hot Cocoa? I know I couldn’t. This is an eagerly welcomed gift, and one that just might end up asking for a refill. A Ball jar, with an added label gives this easily made gift extra charm.
On a cold winter’s night a mug of hot chocolate is the perfect touch for a cozy evening. Here is a delicious recipe for a nice jar of homemade cocoa mix.
.
Hot Cocoa Mix
YIELD: almost 4 quarts
8 qt. box powdered milk
8 oz. coffee creamer
2 cups powdered sugar
1 lb. box Nestles Quick
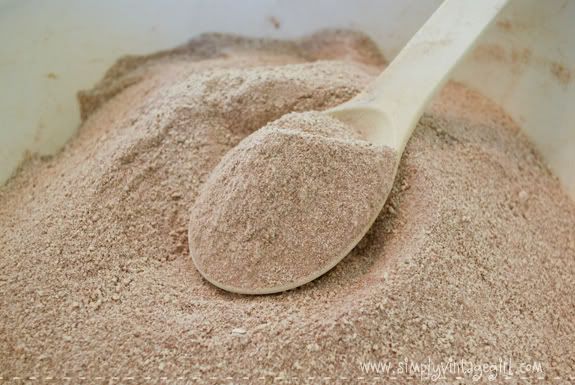
Mix and store. Use 1/3 cup mix to 1 cup hot water.

As an extra treat for my darling readers, I have created labels for you to use on your jars of hot cocoa! You can click here for information on downloading the file.
Have you made or received any homemade gifts? If you’d like to make a post about your homemade gifts, you can sign Mr. Linky below. You can add one of my Homemade Christmas icons to your blog by clicking here. Each Thursday (until the end of December) there will be A Homemade Christmas post! Hope you’ll join in the fun as we learn, inspire, and encourage one another!
| 1. Tina 2. Robin @ Robin’s Egg Blue |
3. BreezyTulip 4. Emily 5. Missie |
6. SchoolinRHome 7. Meg |
23 October 2008
Welcome to the first A Homemade Christmas! This is week One of Ten (you don’t have to enter in each one). I hope you’ll join us in sharing about homemade gifts that you have received or made — past, present, and future!
You can click here for the Introductory post.
This calendar will last a very long time, which makes it a great gift. Since it is perpetual, it just keeps going. There are lots of things you can do with the idea, and it’s pretty easy to make.
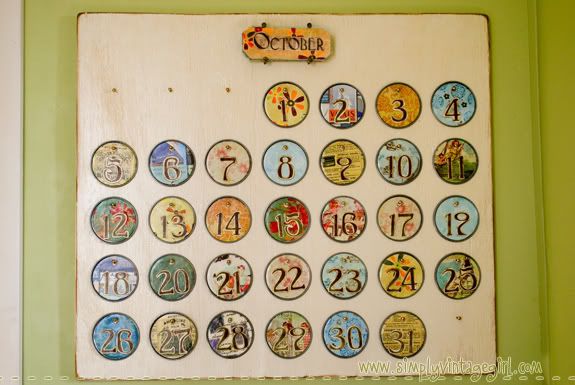
It has a bit of a vintage look to it. Each date is the tin lid of a fruit concentrate can. I used scrapbooking paper for the background of each date. The numbers I printed out on card stock and then cut out with an exacto knife. The background is a wood board that was primed, spray painted, then distressed (sanded and stained).
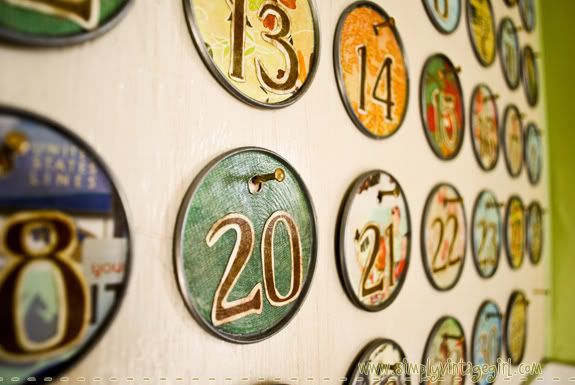
Each date is put together with decoupage glue (we use Mod Podge) with the scrapbook paper in the background, and the numbers stuck down on top of that.
To make the holes, I took a piece of vellum and cut it out the same size and the background paper. I used vellum so that I could see where to put the hole. Near the edge (about 1/4 inch from the edge), I punched a hole in the vellum. This was used as the hole template.
I laid the vellum template on top of each finished date, and marked (with a permanent) the spot where the hole was to be. In this way all of the holes were located in the same place on each one.
My wonderful daddy put holes in the tin lids, and cut out the months.
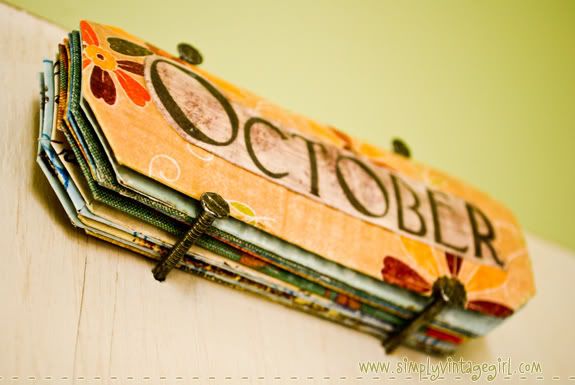
The months are actually cut-outs from the sides of large tin cans (you can slightly see the ripples in the middle). After Daddy cut the tin out, I decoupaged them with scrapbook paper. Four large nails were added to the top to hold the months.
An addition for the calendar (which I haven’t made yet) would be making dates for holidays, birthdays, and anniversaries.
It does take quite a while to make, so if you’re thinking about making one, you better get to work saving all those juice can lids!
Have you made or received any homemade gifts? If you’d like to make a post about your homemade gifts, you can sign Mr. Linky below. You can add one of my Homemade Christmas icons to your blog by clicking here. Each Thursday (until the end of December) there will be A Homemade Christmas post! Hope you’ll join in the fun as we learn, inspire, and encourage one another!
| 1. BreezyTulip 2. Robin@ Robin’s Egg Blue 3. Emily |
4. SchoolinRHome 5. Tina 6. lilie |
7. Jess @ the JOB 8. Buttercup |
8 September 2008
Here is a project I thoroughly enjoyed. With a combination of several different items that are easy to come by, you can come up with a wonderfully attractive little notebook to flip through.
Supplies:
• Tabbed Index Cards – used ten 4″x6″ sized cards
• Scrapbook Paper – for extra beauty
• Two Metal Rings – to bind notebook together
• Tape – double-stick tape or adhesive squares
• Pen – for writing section name on tabs
• Memo Book – one of the dirt cheap ones (same size as index cards – 4″x6″)
• Brads (optional) – for tacking down small frame
• Metal Frame (optional) – found in scrapbooking department, preferably a small size
Directions:
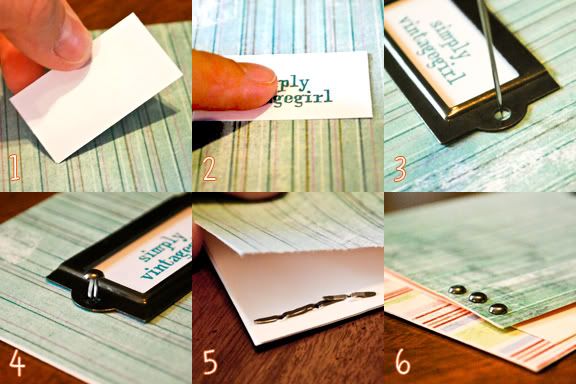
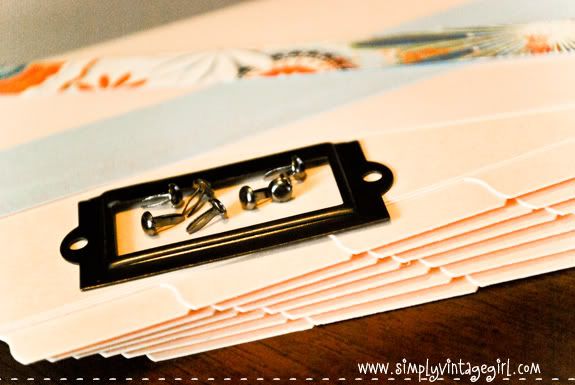
1. Cut out scrapbook paper to fit the front of index card. Take cut-out (to fit metal frame, if desired) printed notebook label and stick to the front with adhesive.
2. Press to make sure it stays.
3. Place metal frame on top of label, and poke holes with a needle or other sharp object (please be very careful).
4. Stick brads through holes to secure frame.
5. Fold back the ends of the brads to make sure they stay put.
6. I added three extra brads to the bottom of the cover of my notebook.

7. For each divider index card, you can leave some blank without any decoration,
8. or you can go ahead and stick scrapbook paper down on each one, and even front and back if you wish.
9. Each of the pages and index cards will need to have holes punched in them so that they can be bound with metal rings. Since all three of us ladies (Mom, Bre and I) were making one, it made it easier to make a template and use it on each of the pages that needed punched. The template was a piece of card stock paper cut out the size of the index cards. Then holes were punched 1.5″ from the edge on both top and bottom (making two holes). In this way, all we had to do was lay the template on the paper, and with a pen or pencil draw a dot in the center of the hole that had been punched out of the template.
10. Take paper with mark from template, and center the dot in the hole punch. Punch hole.
11. Continue to do this with each page, and when you are finished they should all line up just right, with the holes in the exact same place on each page.
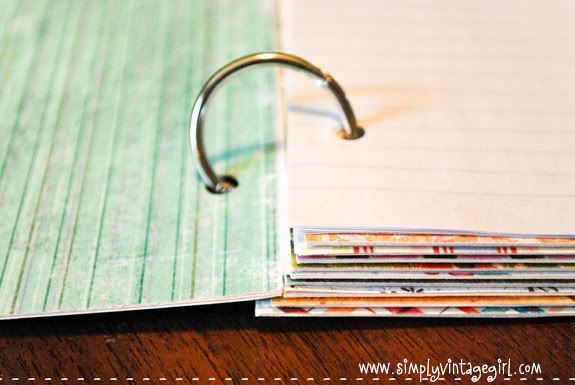
12. Unhook metal rings and poke through holes.
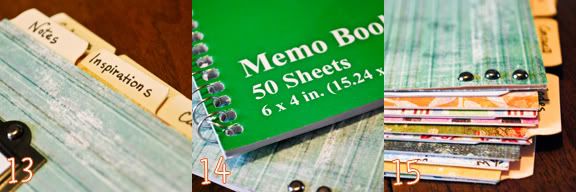
13. Label each section on the tab that sticks out from cards.
14. Rip the paper out of the memo book, and cut of the ripply, bumpy edge. Use the hole punch template to punch holes through lined paper in the right spots.
15. Unhook the metal ring and add the lined paper. This will give thickness and room to write in the notebook.
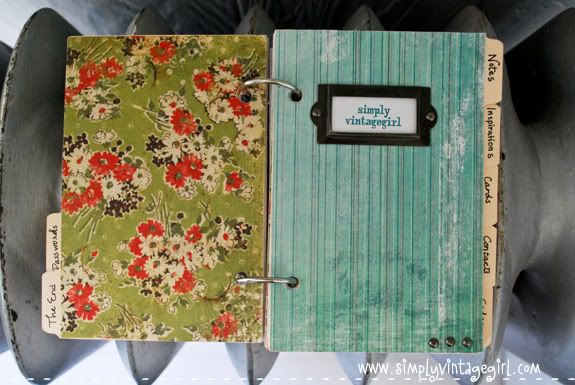
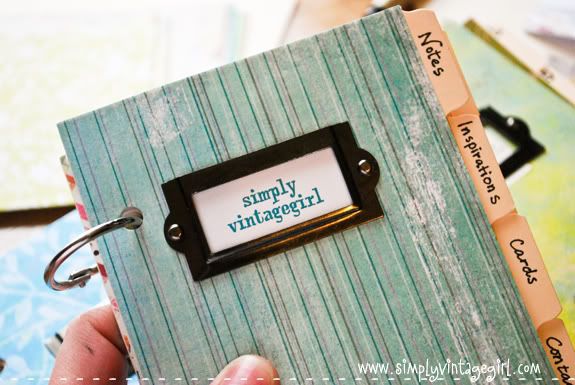
This is of the back and front covers of my little notebook. The tab on the back cover says, The End.
On the covers, I scrapbooked on both the front and the back side of the index card. In each section there are seven sheets of memo paper.
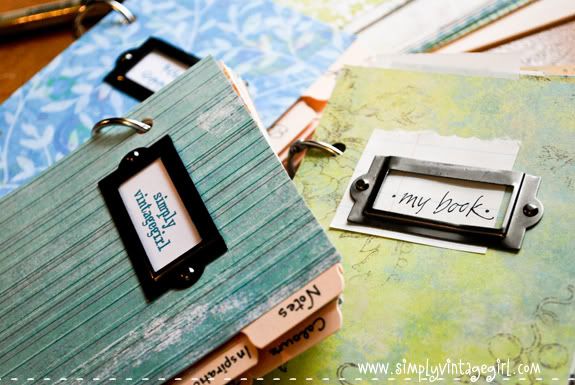
Momma’s is farthest away – Robin’s Egg Blue. Breezy’s is titled – My Book. And as you’ve probably noticed, mine is – simply vintagegirl.
Both Momma’s and Breezy’s tabs are alphabetically labeled, as in A, B, C, D, etc.
The tabs of my notebook are entitled: Notes, Inspirations, Cards, Contacts, Codes, Colours, Blogs, Photographs, Passwords, and The End. I am planning on adding a few more before “The End”, which will say: Scripture, Quotes, Recipes, Important Dates, and Post Ideas.
Hope you enjoy making your own little notebook!