8 September 2008
Here is a project I thoroughly enjoyed. With a combination of several different items that are easy to come by, you can come up with a wonderfully attractive little notebook to flip through.
Supplies:
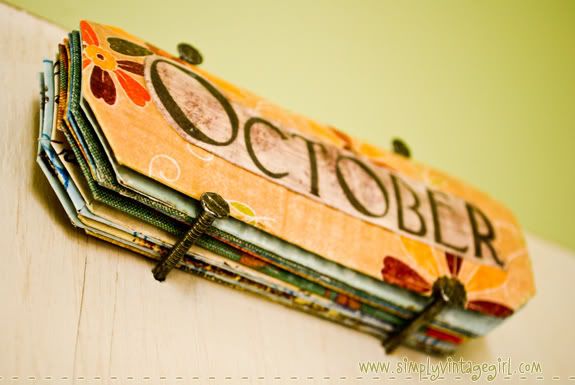
• Tabbed Index Cards – used ten 4″x6″ sized cards
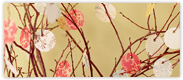
• Scrapbook Paper – for extra beauty
• Two Metal Rings – to bind notebook together
• Tape – double-stick tape or adhesive squares
• Pen – for writing section name on tabs
• Memo Book – one of the dirt cheap ones (same size as index cards – 4″x6″)
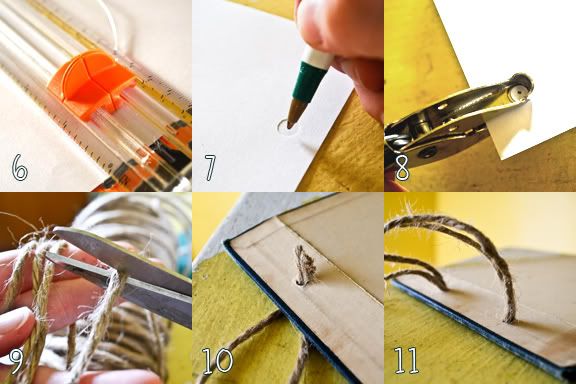
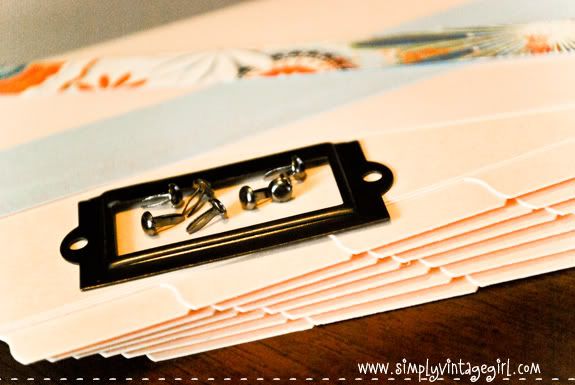
• Brads (optional) – for tacking down small frame
• Metal Frame (optional) – found in scrapbooking department, preferably a small size
Directions:
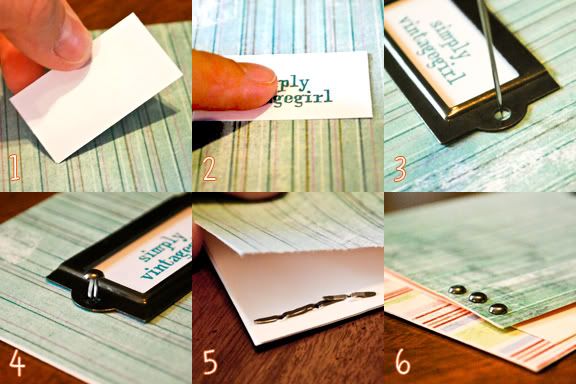
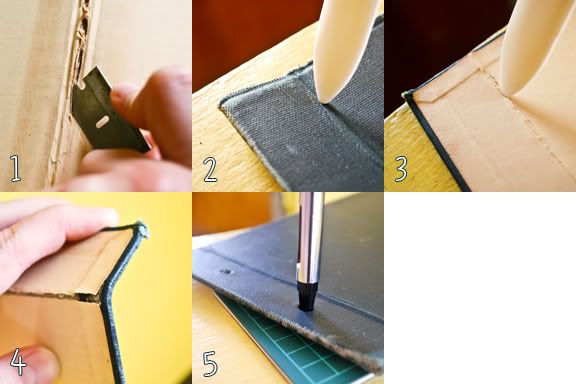
1. Cut out scrapbook paper to fit the front of index card. Take cut-out (to fit metal frame, if desired) printed notebook label and stick to the front with adhesive.
2. Press to make sure it stays.
3. Place metal frame on top of label, and poke holes with a needle or other sharp object (please be very careful).
4. Stick brads through holes to secure frame.
5. Fold back the ends of the brads to make sure they stay put.
6. I added three extra brads to the bottom of the cover of my notebook.

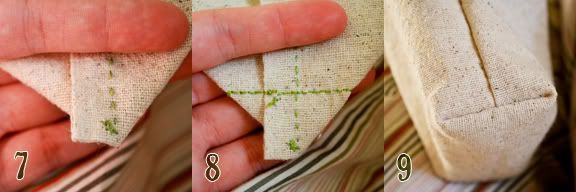
7. For each divider index card, you can leave some blank without any decoration,
8. or you can go ahead and stick scrapbook paper down on each one, and even front and back if you wish.
9. Each of the pages and index cards will need to have holes punched in them so that they can be bound with metal rings. Since all three of us ladies (Mom, Bre and I) were making one, it made it easier to make a template and use it on each of the pages that needed punched. The template was a piece of card stock paper cut out the size of the index cards. Then holes were punched 1.5″ from the edge on both top and bottom (making two holes). In this way, all we had to do was lay the template on the paper, and with a pen or pencil draw a dot in the center of the hole that had been punched out of the template.
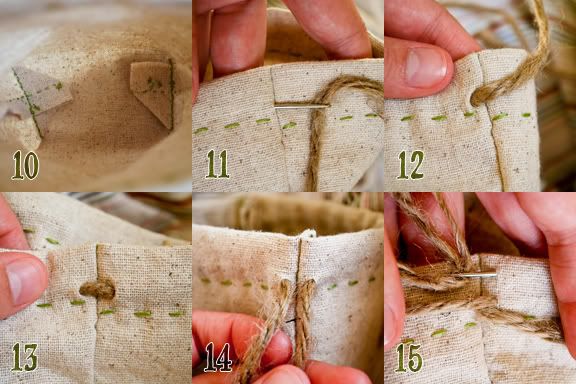
10. Take paper with mark from template, and center the dot in the hole punch. Punch hole.
11. Continue to do this with each page, and when you are finished they should all line up just right, with the holes in the exact same place on each page.
12. Unhook metal rings and poke through holes.
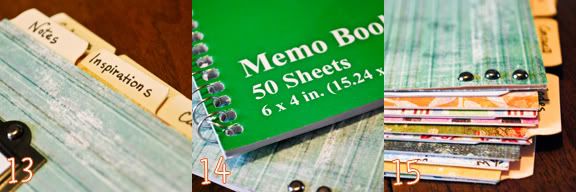
13. Label each section on the tab that sticks out from cards.
14. Rip the paper out of the memo book, and cut of the ripply, bumpy edge. Use the hole punch template to punch holes through lined paper in the right spots.
15. Unhook the metal ring and add the lined paper. This will give thickness and room to write in the notebook.
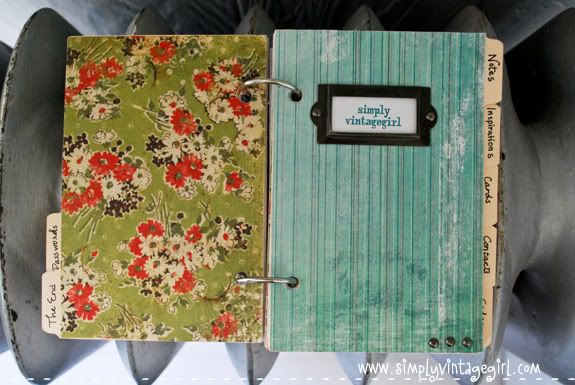
This is of the back and front covers of my little notebook. The tab on the back cover says, The End.

On the covers, I scrapbooked on both the front and the back side of the index card. In each section there are seven sheets of memo paper.
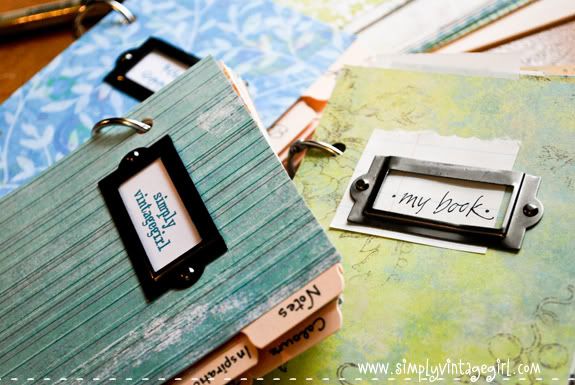
Momma’s is farthest away – Robin’s Egg Blue. Breezy’s is titled – My Book. And as you’ve probably noticed, mine is – simply vintagegirl.
Both Momma’s and Breezy’s tabs are alphabetically labeled, as in A, B, C, D, etc.
The tabs of my notebook are entitled: Notes, Inspirations, Cards, Contacts, Codes, Colours, Blogs, Photographs, Passwords, and The End. I am planning on adding a few more before “The End”, which will say: Scripture, Quotes, Recipes, Important Dates, and Post Ideas.
Hope you enjoy making your own little notebook!

[46] Comments » | Categories: Handmade, Inspirations, Life, The Home, Vintage