12 November 2009

This dip is delicious! Below are the recipes for Chili Seasoning Mix (what you’ll add to the meat), Chili Meat (what you’ll add to the dip), and Cheesy Chili Chip Dip (which you will eat). This is the perfect snack-ish dish that goes quite quickly (if you have more than eight feasting upon it, you may wish to make a second pie plate of it!).

Chili Seasoning Mix
1 Tb. all-purpose flour
2 Tb. minced dried onion
1½ tsp. chili powder
½ tsp. ground red pepper
½ tsp. instant minced garlic
½ tsp. sugar
½ tsp. ground cumin
Combine all ingredients in a small bowl. Makes 1 package or about 1/4 cup Chili Seasoning Mix. We make this in bulk so that we have it on hand and do not have to mix a small batch every time we need it.
(If you are just wanting to make the seasoning mix for future use, store in a small jar or bag that is airtight. Use within 6 months.)
Chili Meat
1 lb. ground beef
1 – 28 oz. can crushed tomatoes
Chili mix (recipe above)
Fry ground beef in skillet, making sure to chop thoroughly. Add crushed tomatoes and chili mix to the fully cooked meat in skillet and mix well.

Cheesy Chili Chip Dip
1 – 8 oz. pkg. neufchatel cheese (reduced fat cream cheese)
1/2 of the Chili Meat (above)
1-1½ cups shredded cheese (sharp or Mexican)
Evenly spread the cream cheese in pie plate. Layer the chili meat on top (only half of the recipe above, you can freeze the rest of the chili meat for another dish of this delicious dip or a batch of chili). Sprinkle shredded cheese over meat. Microwave for 5-6 minutes (checking on it every minute), or bake in oven at 350°F for 10-15 minutes (I’m guessing, so you’ll want to check in on it). Serve with tortilla chips.
I hope you enjoy it! When the Seasoning Mix and Chili Meat has been prepared ahead of time, it makes for a quick and easy dish. This was one of the things we ate while Sarah Mae and her family were staying with us . . . we all thought it was scrumptious!

13 October 2009

Don’t those look delicious? When Mom found this recipe for Onion Strings at the Tasty Kitchen, she knew it was something we would try. Onion Strings are very much like onion rings — the only difference being the fact that they are narrow rather than thick strips.
Just when we thought our only options for good onion rings was at a restaurant or at the fair, this little recipe saved the day (figuratively). They are simple to make and taste delicious (but with all the grease, not necessarily something we’d eat everyday).
Their thinness was perfect for me, as I do not like to crunch onions . . . but Daddy prefers them more thick and manly (which I completely understand — my sweet daddy has always really liked onions). It’s completely up to your own taste buds and senses.
Next time we plan on making strings and rings.
Have you tried any new recipes that your family has enjoyed?
8 October 2009

There is nothing that says Autumn quite like the first step into the little store at the apple orchard. The smell is enchanting and brings back many memories of cider, pumpkins, and pounds upon pounds of apples.
Unlike some, the apples at our local orchard are already picked. It does sound most pleasant to pick ones own apples, though! As the apples are already picked, each type of apple is labeled by section and contained by bushel baskets.

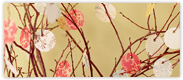
Not only are there apples, there are also pumpkins and a variety of gourds. Behind the store are many, many pumpkins. There was a large pile of smaller ones, and past those there were rows of larger pumpkins. Although we did not purchase any, I went out back to capture a few shots of them (as well as the brimming apple tree at the top of the post).

During our latest trip to the orchard we purchased 60 lbs of apples, the majority of which have been turned into canned applesauce. We plan on going back again soon to get more apples, and in addition to those, plenty of pears to can for pear pies!
10 August 2009

“Cutting in the Butter”
August is a busy month this year! The Lord has blessed our family with a large and exciting project which we will be spending the majority of our time on for the next several weeks. I think you all will really like it . . . but it isn’t ready to be unveiled yet.
In the meantime you can enjoy the photos that I post as you eagerly await the announcement!
So you don’t miss out on our new adventure, stay updated by subscribing here!
18 February 2009
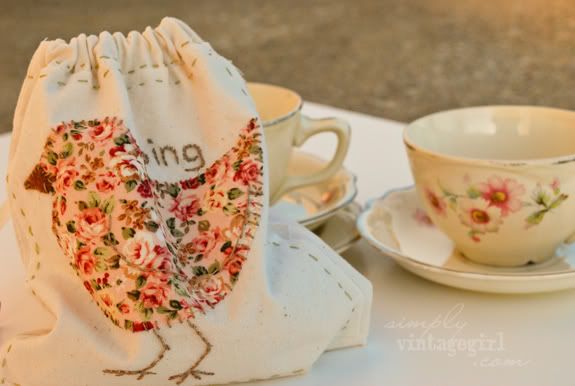
These were in the background of a photo shoot I did for the Girlhood Home Companion (a beautiful magazine for daughters, mothers, and grandmothers).
Momma made the made the little birdie pouch. It is themed off of a pouch my sister, Breezy, made several years back. The simple whimsy of it is darling.
The tea cups have been around for a long while. I don’t remember a time when we did not have them. We still use them as we always have – for muffins and milk. They are old, chipped, and cracked, but just as lovely as they ever were.
2 December 2008

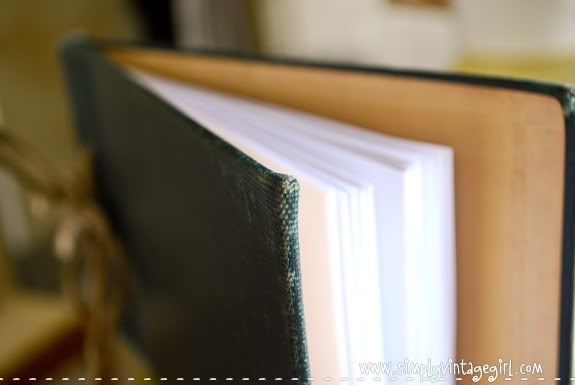
An autograph book is a sweet place to store and collect autographs. From family to friends, and even the famous. You can use it as a guest book for the visitors in your home, at graduation parties, etc. It is nice to go back and read through it to see what notes others left. What a great way to remember the special events in your life!
Supplies:
• Cover of an Old Book, preferably blank
• Razor Blade
• Boning Tool
• Eyelet Punch
• Hammer
• Paper Cutter or Scissors
• Hole Punch
• Twine
Directions:
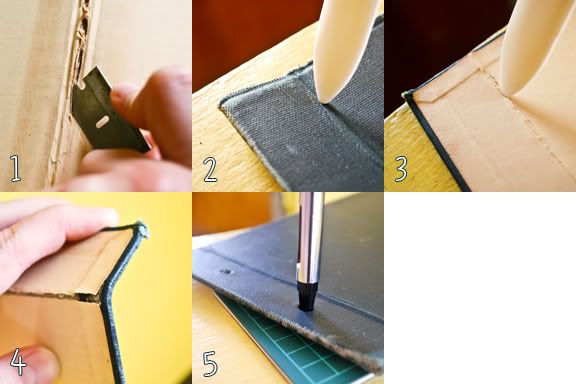
1. Cut the cover of the old book from the binding. I found that a razor blade works best, but please take all caution when using one.
2. Use boning tool to put crease in book cover. Mine is about 1.25″ from the edge.
3. Repeat step 2 on other side.
4. Bend the cover backwards where the creases were made.
5. To punch holes in cover, use an eyelet punch and hammer to go all the way through. Make sure to have a protected surface underneath (I used a self-healing mat).
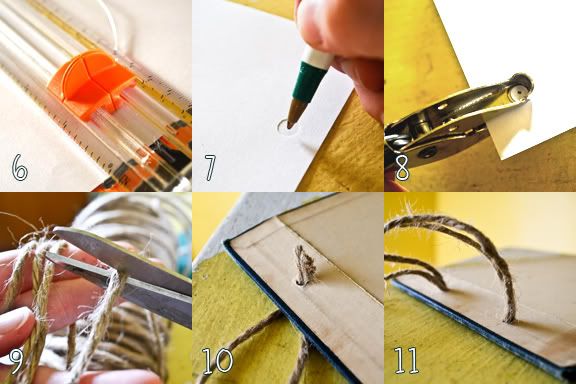
6. Cut paper to the desired size that will fit inside book cover. I cut 8.5″x11″ sheets in half, making 5.5″x8.5″ sheets.
7. You can make a template out of paper by punching holes in the correct place, then align the template on top of the cut-out paper, and make a mark in the center.
8. Punch a hole with the dot in the center. In this way each page should line up just right.
9. Cut a piece of twine that will be long enough to go around both holes, with extra length to tie a bow. I doubled my twine because with only one it was too loose and the holes were too large.
10. Poke the twine through the hole from the outside on the back cover. Pull about half the length through.
11. Take the other end and poke through the other hole, and pull the rest of the way through until each side is about the same length.
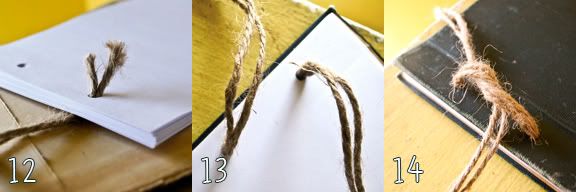
12. Poke each side through the stack of cut and punched paper.
13. Pull through until each side is even. Add front cover and pull through.
14. Knot securely and add a bow for prettiness.
A few ideas for extra beauty: Old photos, lace, ribbon, buttons, etc. I have not added any decoration to mine yet, though I do plan on doing so.
I now wish I had made one long ago because I have acquired several autographs, but they are all in different places. I hope you enjoy making your own autograph book!
30 October 2008

Welcome to the second A Homemade Christmas! This is week Two of Ten (you don’t have to enter in each one). I hope you’ll join us in sharing about homemade gifts that you have received or made — past, present, and future!
You can click here for the Introductory post.

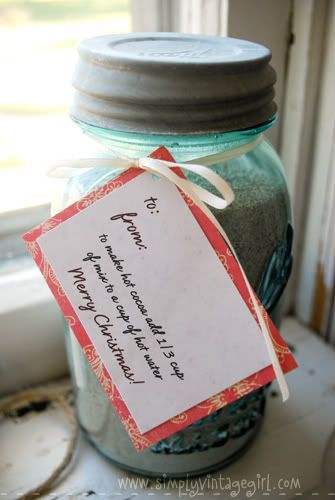
Who could resist a nice warm mug of Hot Cocoa? I know I couldn’t. This is an eagerly welcomed gift, and one that just might end up asking for a refill. A Ball jar, with an added label gives this easily made gift extra charm.
On a cold winter’s night a mug of hot chocolate is the perfect touch for a cozy evening. Here is a delicious recipe for a nice jar of homemade cocoa mix.
.
Hot Cocoa Mix
YIELD: almost 4 quarts
8 qt. box powdered milk
8 oz. coffee creamer
2 cups powdered sugar
1 lb. box Nestles Quick
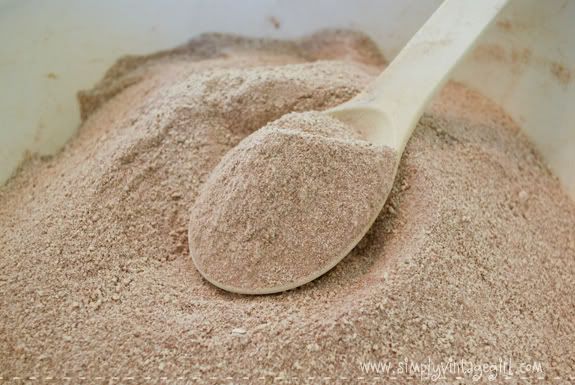
Mix and store. Use 1/3 cup mix to 1 cup hot water.

As an extra treat for my darling readers, I have created labels for you to use on your jars of hot cocoa! You can click here for information on downloading the file.
Have you made or received any homemade gifts? If you’d like to make a post about your homemade gifts, you can sign Mr. Linky below. You can add one of my Homemade Christmas icons to your blog by clicking here. Each Thursday (until the end of December) there will be A Homemade Christmas post! Hope you’ll join in the fun as we learn, inspire, and encourage one another!
| 1. Tina 2. Robin @ Robin’s Egg Blue |
3. BreezyTulip 4. Emily 5. Missie |
6. SchoolinRHome 7. Meg |